Background Removal for Scanned Documents
Often when scanning old documents, the page it was originally printed/written on has turned slightly yellowish, and it is not immediately cleanly reprintable.
So we want to remove the background colour introduced by the page, while preserving the printed dark parts. Normally for text only documents this can be done by simple or adaptive thresholding, to isolate the text elements from the background and only print those. This is for example available in the fantastic application ScanTailor Advanced to clean up scans.
But thresholding is no good if you want to preserve grey tones or you have some coloured markings you would like to preserve, like for example old scanned sheet music or the beautiful illustrations below. In these cases there is the following general strategy:
- Somehow generate an image of the clear page without writing on it, to get the background color we want to get rid of.
- Divide all the color values of the original picture by the ones of the generated clear page.

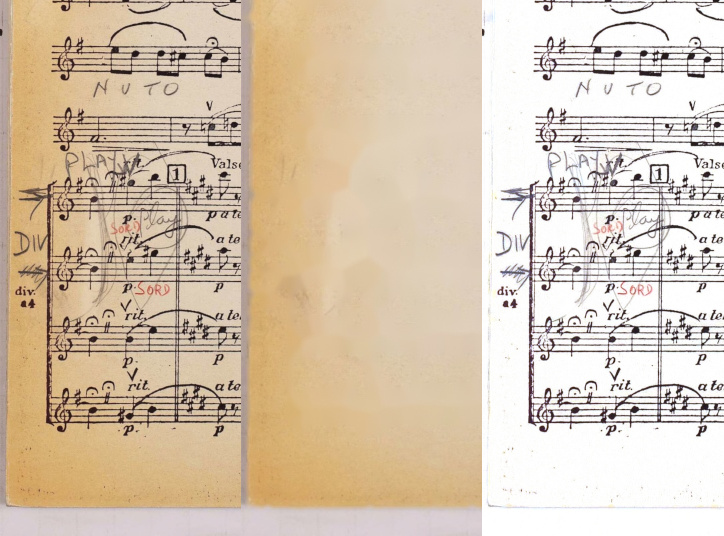
Left to right: Original image, generated background, cleaned image
There are multiple ways of obtaining a clean background, and that is what I’ll outline here.
Bluring
To get an approximation of the Background you can just blur the image! As long as the printed areas are quite sparse and thin, this works fantastic.
This approach seems to be relatively common and is described in the ImageMagick manual and in this stackoverflow awnswer.
If you’re using linux and have ImageMagick installed, the following command from the ImageMagick manual will do the trick:
magick input.png \( +clone -blur 0x50 \) \
    -compose Divide_Src -composite  nobg.png
The 50 in -blur 0x50 is the blur radius, so adapt that to your needs.

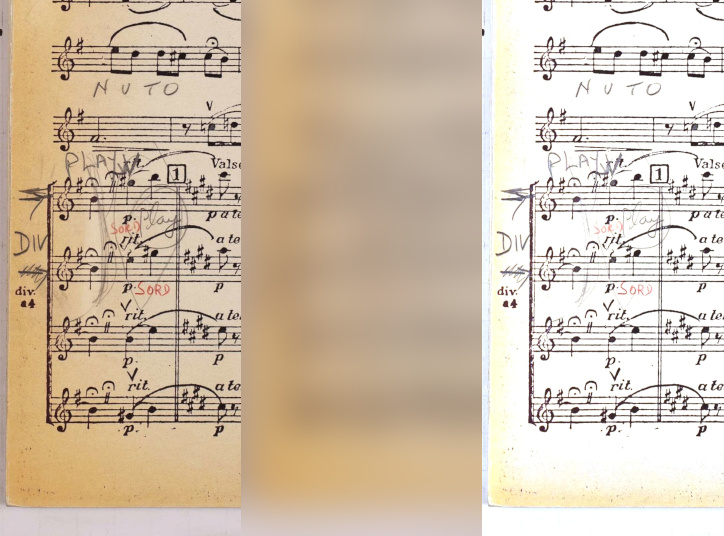
Results using Bluring.
Left to right: Original image, generated background, cleaned image
Note that in the area with lots of markings the writing is getting a bit lighter that it should be.
Morphology
Generally the printed parts of the page are darker than the page background. We can use that to our advantage by using an old image processing technique, morphology. Again the ImageMagick site has a good introduction.
We want to look at each pixel, and some neighbourhood of the surrounding pixels. Then we colour that pixel with the colour of the brightest pixel in the neighbourhood. If we choose our neighbourhood large enough so that we include at least one pixel of page background, the printed text will be effectively removed. This corresponds to the “Dilate” operation.
A small refinement we can use is, instead of the Dilate operation, we use ImageMagicks “Close” operation. This is a Dilate operation (expanding light parts) followed by a “Erode” (expanding dark parts). This way, after our Dilate operation, all our printed parts are hopefully removed, and by eroding we restore the larger discolourations of the page to their original shapes.
Some basic command that uses this method might look like this:
magick input.png \
    \( +clone \
       -morphology CloseIntensity Octagon:12 \) \
    -compose Divide_Src -composite nobg.png
The Octagon:12 specifies the size and shape (Octagon) for the neighbourhood that is searched.
But don’t run this on your collection of high resolution scans yet, the morphology operations in ImageMagick are rather slow. There are some alternatives: You can use something faster, like the implementation in OpenCV (which can easily be accessed using its python interface, see below), or just scale down the image for running the morphology operations, and scale it up afterwards. This will loose some resolution in the background, but that is usually not that important.
So here is the command that does that:
magick input.png \
    \( +clone -resize 25% \
       -morphology CloseIntensity Octagon:4 \
       -resize 400% \) \
    -compose Divide_Src -composite nobg.png
This method usually works great, even on densely printed pages. However sometimes the printed areas are just too large to be reasonably filled by this method.

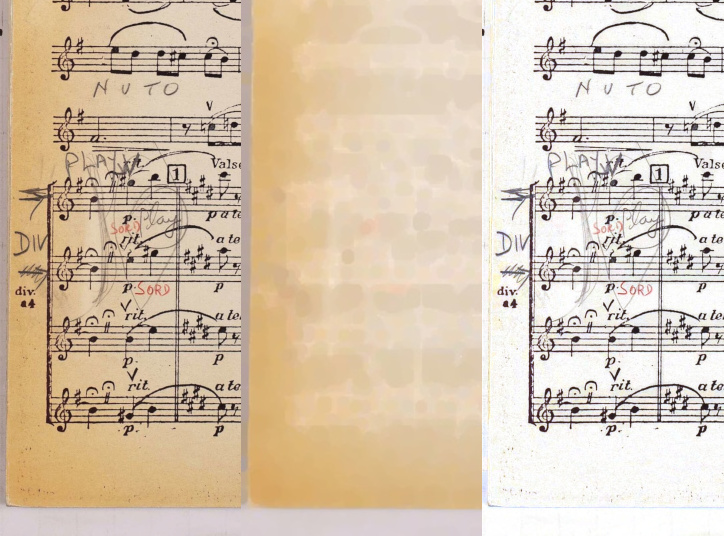
Results using Close Morphology.
Left to right: Original image, generated background, cleaned image
Inpainting
If we have a large patch of printed area, such as an illustration like in the stackoverflow question from above, the two methods above do only work with mild success.
To deal with such situations, it would be great if we could isolate the printed parts of the image, remove them, and fill in the holes with suitable background colours.
For this we’ll use Python and OpenCV, since it has a handy inpainting function.
So we’ll first detect what areas belong to printed areas. This is a bit fiddly and depends on the image you are using. There is thresholding, adaptive thresholding and edge detection. Usually a combination of those three methods does the trick. Below I just use edge detection.
Then we use a dilate morphology on this mask to grow this a bit to avoid edges, and a close morphology to close any smaller holes in the mask.
After that, we use the inpainting function to refill all the areas marked as printed, to obtain our background. As the inpainting function can take some time, we also do all this on a downscaled version of our scan.
Here is some example code:
import cv2 as cv


kernel_size = 4
resize_factor = 5
threshold_patch_size = 101

img = cv.imread("input.png")

# get edges before rescaling to preserve fine detail.
edges = cv.Canny(img, 100, 200)

# resize original and edges image
new_size = (round(img.shape[1]/resize_factor),round(img.shape[0]/resize_factor))
img_small = cv.resize(img, new_size, interpolation = cv.INTER_AREA)
edges = cv.resize(edges, new_size, interpolation = cv.INTER_AREA)

# uncomment to create adaptive threshold to detect content
#content = cv.cvtColor(img_small, cv.COLOR_BGR2GRAY)
#content = cv.adaptiveThreshold(content, 255, cv.ADAPTIVE_THRESH_GAUSSIAN_C,
#        cv.THRESH_BINARY, threshold_patch_size, 3)
# ...and combine with the edges
#content = cv.bitwise_or((255-content),edges)
content = edges

# Dilate the content mask a small bit
kernel = cv.getStructuringElement(cv.MORPH_RECT, (3,3))
content = cv.morphologyEx(content,cv.MORPH_DILATE,kernel)

# ...and close any holes smaller than kernel_size
kernel = cv.getStructuringElement(cv.MORPH_ELLIPSE, (kernel_size,kernel_size))
content = cv.morphologyEx(content,cv.MORPH_CLOSE,kernel)

# Paint in the content area
img_bg = cv.inpaint(img_small, content, 5, cv.INPAINT_TELEA)

# Scale the content back up
img_bg = cv.resize(img_bg,(img.shape[1],img.shape[0]))

# divide out the backgruond
img_nobg = (img / img_bg)*255

cv.imwrite("nobg.png", img_nobg)

Results using inpainting.
Left to right: Original image, generated background, cleaned image
The difference to the morphology method is here neglible, although it gets rid of a bit more of the page texture (if that is what you want).
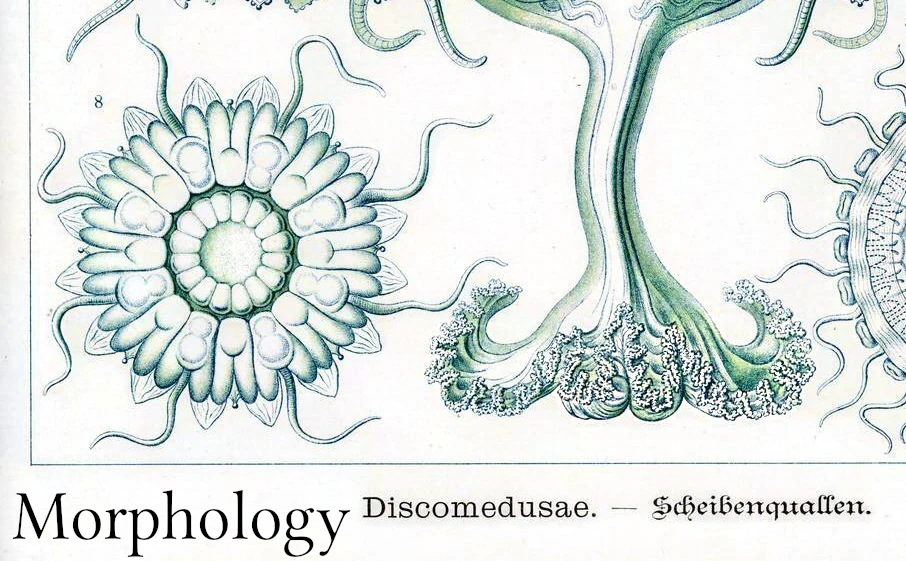
However on an image like that from the stackoverflow question the difference it does a much better job of preserving the color:

Comparison of morphology method vs inpainting on illustrations
All these methods have their drawbacks, but usually I can find one that works well enough for the given situation. I use this mainly when I have a large amount of scanned images and I want to quickly remove the background, without doing it manually for every image.
If these methods are insufficient, it is always possible to manually tweak them, such as generating a background using them, then manually clean up the generated background before dividing.